Variable Information
The Variable Info command presents a spreadsheet-like table where the variable name, guess value, lower and upper limits, display format, units, alternate units and comment for each variable currently in the Equations window can be viewed or changed. These data are initially set to default values. The defaults, which are determined based on the first letter of the variable name, may be set with the Default Info command. Variable information can be saved to or loaded from variable information files (*.VAR) in the Professional license.

The variable name appears in the first column and it can be edited should you wish to change it. For example, you can change the name of all occurrences of variable k to kappa. Alternatively, you may just want to change the case of the variable, e.g., kappa to KAPPA. EES variable names are case-insensitive but the display is affected by the formatting. You can change variable A1 to A[1] to cause it to become an array variable. Note that the names of individual array elements, e.g., m[1], cannot be changed. However, if the Show array variables check box (discussed below) is not checked, then only the parent array name, e.g., m[ ], is displayed and the name of the parent array can be changed. EES variables must start with a letter and they can consist of any keyboard characters except ( ' | ) * / + - ^ { }. When the OK button is pressed, EES will confirm that you wish to change the variable names and will then change every occurrence of each changed variable in the Equations, Diagram and Parametric Table windows. Note that changing variable names in this manner is much preferred to using the Find/Replace capability in the Equations window since none of the other information associated with a variable (e.g., guess value, units etc.) is lost.
The Guess, Lower and Upper value fields may be either numerical values or names of an existing variable. When a variable name is provided, EES uses the current value of that variable as the guess value or bound. The words -inf (or -infinity) and inf or (infinity) are used to indicate unlimited lower and upper bounds, respectively. The control above the Guess column toggles between Guess and Value. If Guess is selected, as shown, the guess values will be displayed and they can be edited. If Value is selected, the current values of the variables will be displayed and they cannot be edited. The Professional license allows the guess value and limits to be specified with equations that can involve existing variables and numerical constants. For example, the guess value for variable X can be set to (X_min+X_max)/2 provided that variables X_min and X_max have been defined.
String variables, identified by a $ as the last character in the variable name, are handled differently in the Variable Information dialog. The Guess value field shows the currently defined string assigned to the variable, but it cannot be edited. The Lower and Upper value fields are blank, as are the Units fields. String variables will not be shown unless the Show string variables control at the upper left of the dialog is selected.
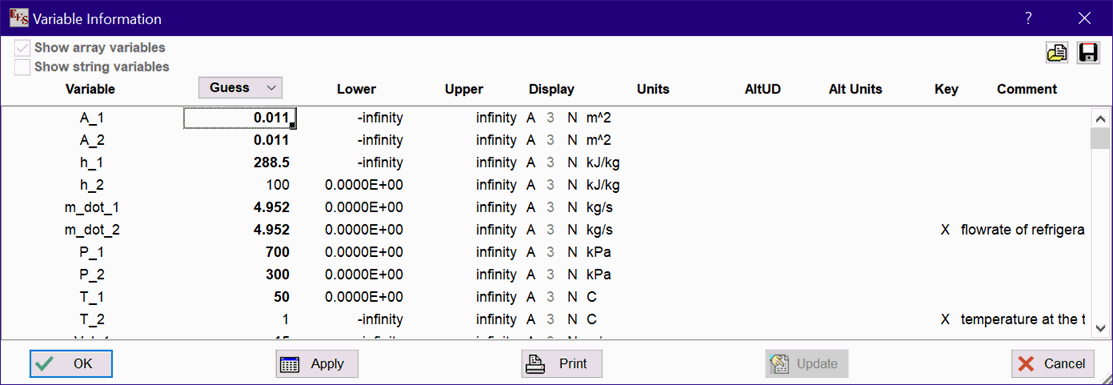
Before this dialog window appears, EES will attempt to solve equations that have a single unknown. If the value of a variable has been pre-calculated, its pre-calculated value will be displayed instead of its guess value in the guess value column and the value will be shown in bold font, as seen for variables A_1, A_2 and others in the above figure. These bold values can be edited and doing so will change the guess values. The change in the guess value may affect the calculated result for these variables.
There are two display modes in the edit fields of the Variable Information dialog. In Selection Mode, the active cell is outlined and there is a small box at the lower right of the cell, as shown above. The contents of the cell can be copied to other cells above or below it by pressing the mouse button while the cursor is positioned within the small box and dragging the cursor to the desired location above or below in the same column. While in Selection mode, Ctrl-C will copy the contents of the active cell to the clipboard and Ctrl-V will paste the contents of the clipboard to the active cell. Selection and Edit modes are applicable to the Guess, Lower, Upper, Units, and Comment columns. Clicking the mouse within the selected cell causes a change to Edit mode. In Edit mode, the outline and small box will not be displayed. Instead, the contents of the cell will initially be highlighted. The usual editing procedures can be applied to modify the contents of the cell. Pressing F2 causes the display to toggle between Edit Mode and Selection Mode. Alternatively, clicking on any other cell or in the header or footer of the dialog will change the display to Selection Mode.
The display format of a variable is controlled by the three columns under the word Display. Clicking the mouse button in the first column will cause a pop-up menu to appear displaying the Display Format options. The number of significant figures is specified in the second column, which can be a number between 0 and 9 or the letter 'M' which indicates the maximum number of significant figures. The third column provides formatting options that take effect in the Solution Window, such as underlining, boxing, or bolding.
The units of the variable may be entered in the Units field. Note that the display format and units of each variable can also be changed by clicking on the variable in the Solution Window. The text entered in the Units field is used by EES when checking unit consistency of the equations. Units shown in purple have been provided by EES. Be sure these units are correct. Click on the unit to accept it. Its color will then change to black. As an alternative to typing the units, it is possible to select the units from a Units List. The Units List is accessed by selecting a cell in the Units column (so it is shown within a rectangle) and then clicking the right mouse button.
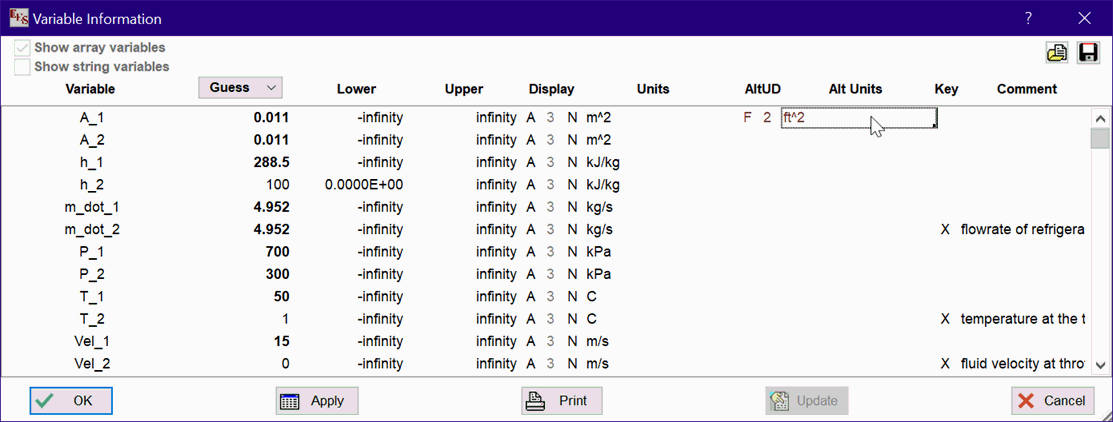
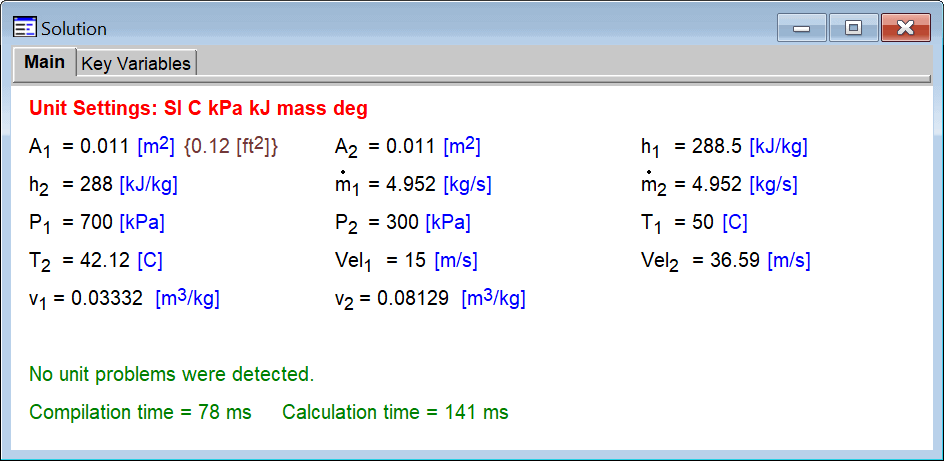
EES can display values of variables in the Solution Window and in the Parametric and Arrays tables converted for an alternate set of units, as shown below. The alternate units can be entered in the Solution Window or in the Alt Units column of the Variable Information dialog. The display format for values in the alternate set of units is, by default, set to Auto. However, the display format can be set by clicking the format specifications or style and digits in the two columns below the AltUD heading.


Variables in the main program will have columns for the Key variable designation and an optional comment. Key variables are displayed in the Key Variables Solution Window with the comment. In the Comment field, a | character is interpreted to be a line break character. Note that the Variable Information dialog can be stretched if necessary to accommodate long comments by dragging the Resize icon located at the lower right corner of the dialog. Also, the edit field for the Units and Comments will automatically scroll as the left and right arrow keys are used if the text is too wide to be completely visible.
The Show array variables checkbox control at the upper left of the dialog window will be accessible if there are one or more arrays are in the Equations window. When this control is selected, all array elements appear in the Variable Info dialog and the guess value, bounds, display format, and units can be set for each individual element as for any other variable. However, when the control is de-selected, all arrays elements are represented by a single entry. For example, m[ ] represents all array elements having the parent name m. If any of the characteristics for a parent array are changed, that change is applied to ALL array elements. For example, changing the guess value for m[ ] will result in the new guess value being applied to all array elements in array m. However, other characteristics, such as the bounds, would not be affected. The units field of the dialog will display 'mixed' if the units of the array variables are not all the same. Note that checking Auto set array units in the Options tab of the Preferences dialog will force the units and alternate units of all array variables to be same as those for the first element. The $AutoSetArrayUnits ON has the same effect. The guess values and bounds for an array can be set to other arrays by entering the array name followed by open and closed square braces. In the figure below, the guess values for all elements in the x array are set to the values of y with the same array index. That is, the guess value for x[1] is y[1], the guess value for x[2] is y[2], and so on. Similarly, the upper bounds for x[1], x[2], ... are set to z[1], z[2], etc. Click the Apply button to make these changes after editing the fields. The changes can be viewed by clicking the Show array variables checkbox to toggle the display of the array variables. In addition, the array name can be changed by editing the name in the first column of the Variable Info dialog.
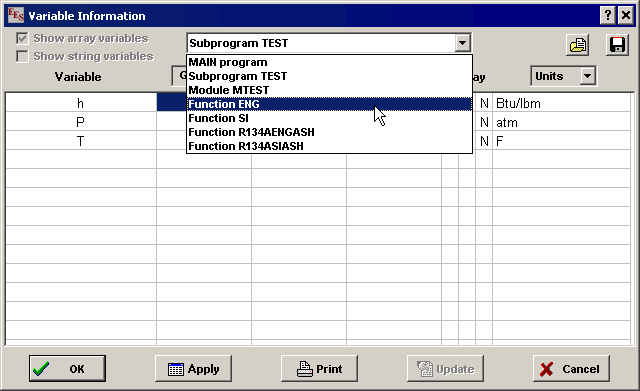
If the Equations Window contains one or more internal Functions, Procedures, Modules or Subprograms, a control containing a list of all these internal routines and the Main program will appear at the center top of the Variable Information dialog as shown below.

The variable information for an internal routine can be specified after selecting the routine from this list. Note that each Function/Procedure/Module/Subprogram has its own set of variables, as does the Main program. Each Function/Procedure/Module may also have separate unit settings, which are set with the $UnitSystem directive. The same variable name may be used the different routines and in the Main program. Using this control, the set of variables corresponding to each function/procedure/module/subprogram can be selected, viewed, and changed. Note that the assignment statements used in internal functions and procedures makes guess values and limits not applicable so these fields are not available for functions and procedures. Also, the guess values and limits for variables that are inputs to a subprogram or module are controlled by the calling program and are thus not applicable. The word "Input" will be displayed in gray, in place of the value in this case.
The Update button operates in a similar manner to the Update Guesses command. However, there are differences when the EES program employs modules. As with the Update Guesses command, the Update button is enabled only if the calculations have been successfully completed. Clicking the Update button will replace the guess value of each variable in the selected module or main program with its current value, i.e., the value determined in the last calculation. If a module is called from the main program more than one time, the values can not be unambiguously determined so the Update button is disabled.
When the OK button is pressed, all changes made to the variable information since the dialog window appeared are accepted and the dialog window is closed. The Apply button acts just like the OK button, but the dialog window is not closed, so additional changes can be made. The Cancel button will restore all fields to the condition they were in when the Variable Information dialog was first presented and then remove the dialog. Clicking the cancel box at the upper right of the dialog does the same thing as clicking the Cancel button. Note that changes made to the Equations window when the Apply button is clicked are not reset if the Cancel button is subsequently clicked.
Keyboard input, as well as the mouse clicks, can be used to move the input edit box to a different row or column in Selection Mode. The up and down arrow keys move the focus up or down one row. The left and right arrows change columns. When the focus is in the Display columns or the Key var column, pressing the Enter key will bring up the options for that column. The PageUp and PageDown keys will move the focus up or down by one less than the number of displayed rows. The Tab key moves the focus to the following column. Shift-Tab move the focus to the previous column. The Enter key moves the focus down one row. The Home key will move the focus to the first selectable cell in the grid. The End key will move the focus to the OK button. Pressing the Enter key will accept the changes and exit the dialog. Pressing the tab key will move the focus to the next button.
The width and height of the Variable Information dialog window can be enlarged from its default settings. To change the height of the dialog, move the mouse to the top or bottom border of the window or to the resize icon at the lower right of the dialog window. The cursor image should change to a double-arrow. Press and hold the left mouse button down while dragging the mouse to a new position. When the mouse button is released, the window will be resized.
See also: $VarInfo directive